

How to Create & Print Barcodes in Microsoft Word (Step-by-Step Guide)
Barcodes are essential for managing inventory, tracking products, and streamlining sales processes. Whether you are running a retail store, selling homemade goods, or distributing packaged food from a small business, each product should be labeled accurately with its name, price, and barcode. Attaching barcodes not only reduces human error but also improves the efficiency of product transactions, especially when using a point-of-sale system like AlnicoSoft.
While there are many barcode generator tools available, Microsoft Word provides a simple, cost-effective solution—especially when paired with Excel for bulk product data. This guide will show you how to create barcodes in Word, generate labels efficiently, and print them with professional results.
For a deeper understanding of barcodes and their applications, you can also refer to our detailed blog: “Barcode”.
What You’ll Need
Software Requirements
- Microsoft Word (Office 365 or later recommended)
- Microsoft Excel with your product data
Printer and compatible label sheets
Supported Barcode Types

Microsoft Word field codes support 10 types of barcodes, including UPC, Code 39, and Code 128. This guide focuses on Code 128, the most commonly used barcode for product labeling. You will need to have a printer and compatible paper to print the labels.
Step-by-Step Guide: Creating Barcodes in Word
Prepare Your Excel File
You may have an excel file containing all product details. If not, then the first step is to create an excel file. The format of the file needs to be as follows :
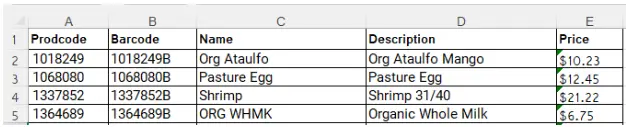
Please note –
- The first row is used to define the column name. The word is going to use the data of the “Barcode” column to generate a corresponding barcode image.
- Price column must be text and it needs to be started with a ‘$’ symbol. Word is going to print the exact price including ‘$’ on the label.
Save the file in the local drive.
The next step is to import the product excel file in a new word document and print labels for each individual product by utilizing word field codes.
Word Field Codes
Field codes are placeholders of data defined in word documents in a particular manner so that actual value can be placed dynamically by the Word processor. The “DisplayBarcode” and “MergeField” field codes are being used to generate labels.
DisplayBarcode
This field code is used to generate the barcode. This accepts mainly two parameters – actual barcode value and type of the barcode. For more detail please refer – DisplayBarcode
MergeField
This field code is used to collect data from the data source (like an excel file) and print in a word document dynamically.
Create Product Labels
Following steps will import the product list from the spreadsheet to a word document and generate the labels.
Start the Mail Merge Wizard
- Open a new word document and click on the “Mailing” menu.
- Click on the “Start Mail Merge” button and then click on the “Step-by-Step Mail Merge Wizard” sub-menu. This should open the “Mail Merge” wizard near the right bar.

Word Label Setting
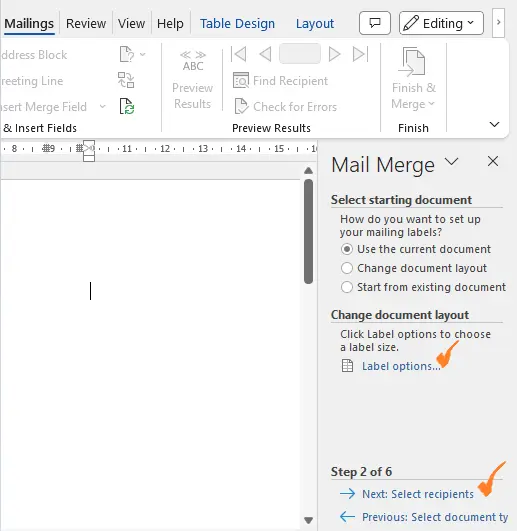
- Select document type “Labels” option and click on “Next: Starting document”.

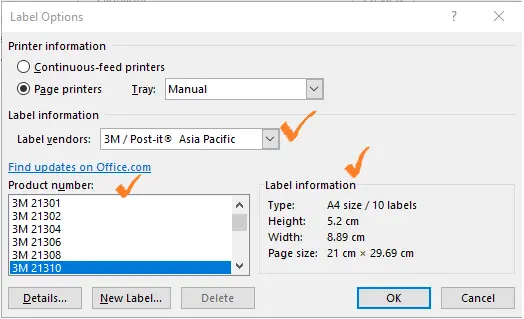
- Click on the option “Labels” to select different label types. A “Label Option” popup will be displayed.
- Select the appropriate label vendor and product number. This product number should be printed on the labels paper package purchased from the vendor otherwise, select the appropriate product for the product list. Please make sure the correct label information is displayed in the “Label Information” section.
- After selecting the correct label options, click on “Next: Select recipient” to read the product data from the excel file containing product information.
Import Excel in Word
- In this step, you need to select and import the data from the product excel file list. Click on the “Browse” menu available in “Use an existing list” block.
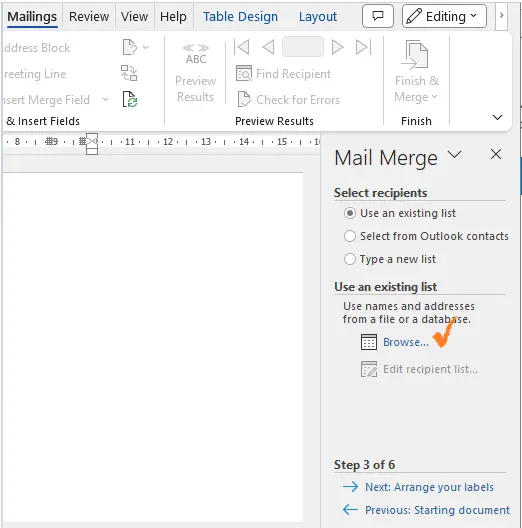
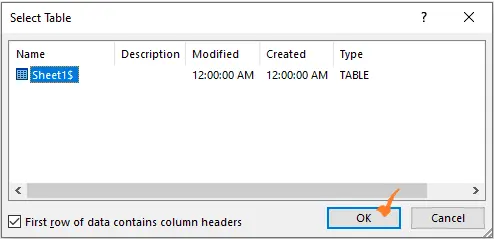
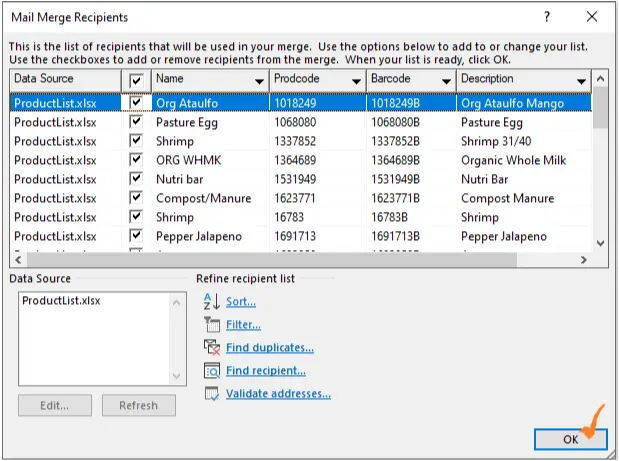
- Word will open a popup with all product information. You will be able to import the data from a single sheet. Uncheck the row in case you don’t want to print the label for that product. Otherwise, click ok.
Creating Label Template in Word
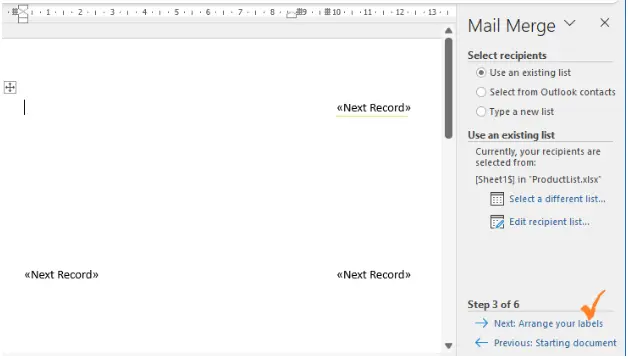
- This will display the page something like below. Where “<<next Record>>” depicts the position of each label. Now, generate the template using field codes.
Click “Next: Arrange your labels”.
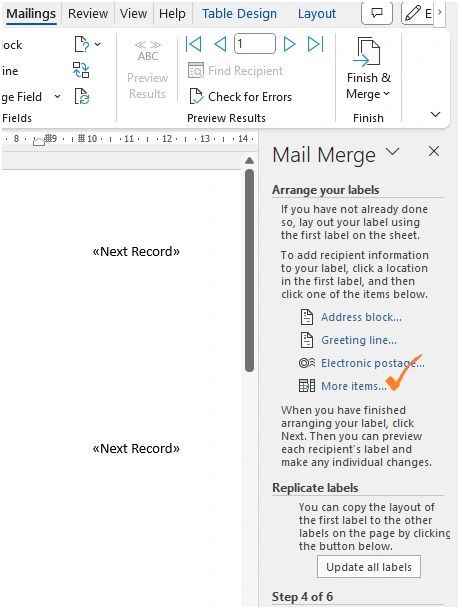
- Click “More Items” to display the popup with all column names of the excels file. The system will allow you to choose the columns which you would like to display on the product label.
- Double click fields in sequence 1) Description 2) Name 3) Barcode.

This will insert a DB field name as «Description»«Name»«Price» in the word document.
- Place a cursor in between «Description» and «Name» and press enter two times. The word document will look like –
Now, we need to follow a few more steps to print the barcode between the description and the name.
- Place the cursor in between «Description» and «Name». Then press Control+F9, this will enable us to enter Field Code in the word document.

- Enter DisplayBarcode” including the quotations.
- Place the cursor beside the quote.

- Then, press Control+F9 and type “MergeField Barcode”. Place the cursor at the position marked with orange color.

- Enter ” Code128 \t \h 1440 | in between last two brackets.

- Click on “Update all labels” to copy the layout from the first label to all the rest.

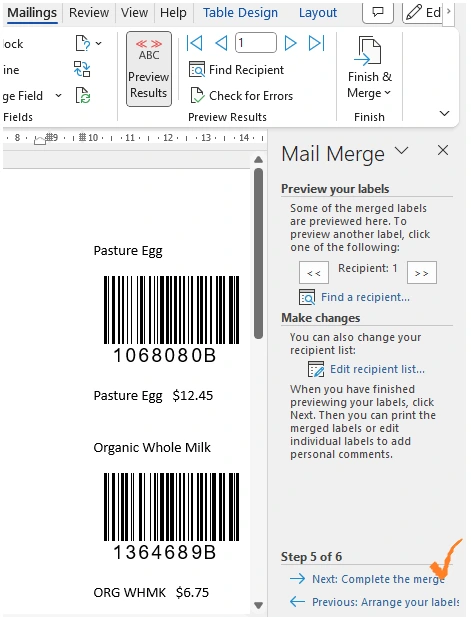
Preview and Update Label
- Click on the “Next: Preview your labels” link. This will give you an opportunity to modify the template.

Please note a space has been added in between “<<Name>> and “<<Price>>. The space has been added in the first label and then, clicked on “Update all labels” to replicate the changes to the rest of the labels.
Print Product Labels
- Click the “Next: Complete the merge” and save for future reference or print the document.
Tips for High-Quality Barcode Printing
Best Practices
- Print on high-quality label sheets.
- Ensure sufficient contrast (black bars on white background).
- Maintain consistent barcode size.
- Avoid resizing barcodes disproportionately.
FAQ: Barcode in Word
Can Word Create All Barcode Types?
Word supports many popular formats via DisplayBarcode. For specialized codes, consider using add-ins.
Do I Need Extra Software?
No — Word and Excel are sufficient. Add-ins are optional for convenience or advanced features.
Why Isn’t My Barcode Scanning?
- Check barcode type compatibility.
- Ensure print quality and spacing are correct.
- Verify font and label settings.
Conclusion
Creating barcode labels in Microsoft Word is a simple, cost-effective solution for small businesses and inventory managers. By using Excel product data together with Word’s mail merge feature and the DisplayBarcode field, you can quickly generate professional, scannable barcode labels without needing additional software. This process is ideal if you already maintain your product list in Excel and have a licensed version of Microsoft Word. It allows you to print labels using a regular printer, avoiding the cost of specialized label printers.
The barcodes created through this method are fully compatible with the AlnicoSoft system, making it a fast and reliable option for integrating with your point-of-sale and inventory management workflows.
References
- https://alnicosoft.com/barcode/
- Add barcodes to labels microsoft https://support.microsoft.com/en-us/office/add-barcodes-to-labels-495cf789-c9d9-4ea5-8eb9-7299170d4831. Retrieved 05 December 2023.
- Field codes: DisplayBarcode microsoft https://support.microsoft.com/en-us/office/field-codes-displaybarcode-6d81eade-762d-4b44-ae81-f9d3d9e07be3 Retrieved 05 December 2023.
Get Started with AlnicoSoft Today!
Simplify your inventory management and streamline sales by generating professional barcode labels in Word fully compatible with AlnicoSoft POS. Sign up now to access all the features and start managing your products efficiently.
1 thought on “How to Create & Print Barcodes in Microsoft Word (Step-by-Step Guide)”
Pingback: Product ID vs SKU vs Product Code vs Barcode: Understanding the Differences for Smarter Inventory Management - AlnicoSoft